Materials Needed:
Doll dressed in clothes you intend the belt for.
Measuring tape
Pleather, leather, suede, or faux suede
Scissors
Sewing Pens
Thread
Needle
Glue (Fabric for the fake stuff, and a good glue that works on leather for the real stuff.)
Tooth pick
Doll dressed in clothes you intend the belt for.
Measuring tape
Pleather, leather, suede, or faux suede
Scissors
Sewing Pens
Thread
Needle
Glue (Fabric for the fake stuff, and a good glue that works on leather for the real stuff.)
Tooth pick

Step One:
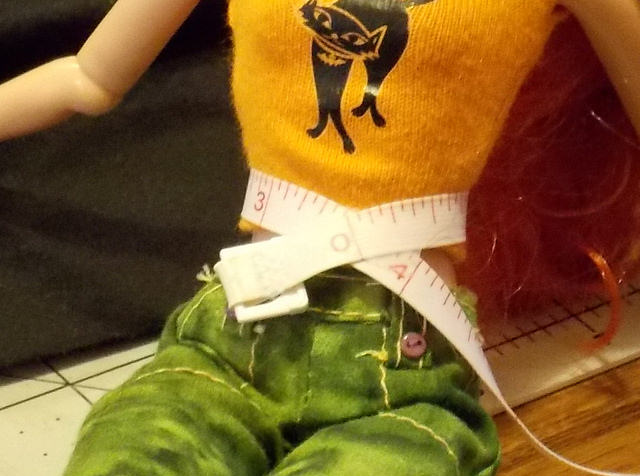
Measure around the waist of the doll you are making the belt for while she or he is dressed. My doll has a waist of 3 1/2 inches dressed.
Measure around the waist of the doll you are making the belt for while she or he is dressed. My doll has a waist of 3 1/2 inches dressed.
Step two:
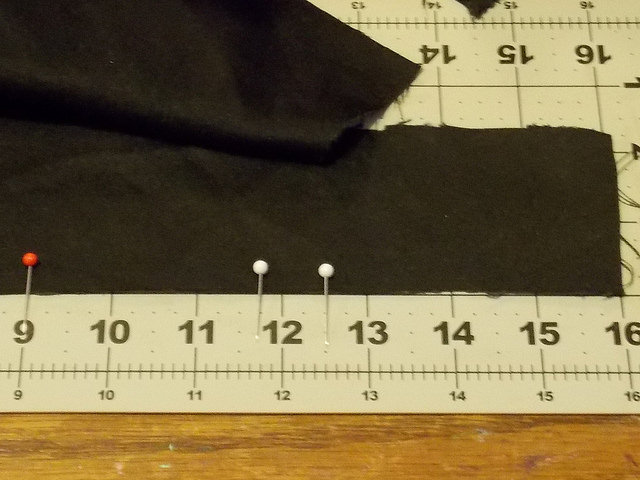
Measure out your waist length and add 2 3/4th inches to that. I went to the next full inch giving me a total of 7 inches in length for the belt. This will leave you with room to shorten once the belt is done. Mine is marked out from the 16 inch mark to the 9 inch mark.
Measure out your waist length and add 2 3/4th inches to that. I went to the next full inch giving me a total of 7 inches in length for the belt. This will leave you with room to shorten once the belt is done. Mine is marked out from the 16 inch mark to the 9 inch mark.
Step three:
Cut out the belt. Now I cut mine at least twice as wide as I needed it to be. That way I don't actually end up cutting too narrow and messing it up. Then I trim it down to the right width and round off the end. 1/4th inch wide is a good width for a 1/6th scale doll belt but no narrower than 1/8th inch. It would be too weak for a belt then.
Cut out the belt. Now I cut mine at least twice as wide as I needed it to be. That way I don't actually end up cutting too narrow and messing it up. Then I trim it down to the right width and round off the end. 1/4th inch wide is a good width for a 1/6th scale doll belt but no narrower than 1/8th inch. It would be too weak for a belt then.
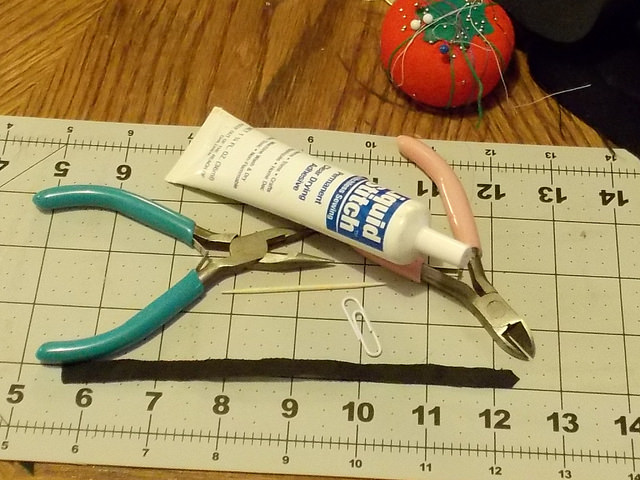
Here you see the next few items you are going to need. The most important item is the paper clip. I am using a white coated one as it is easier to see in the photos but any wire as strong as it will work fine. The added benefit of the coating is it won't rust as easy.
Step four:
Cut a piece of wire 2 inches long. It's going to be more than your need but trust me when I say it would be far harder with any shorter.
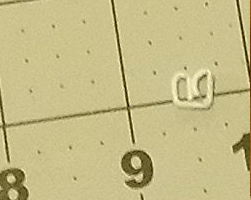
Step Five:
Bend the wire into shape. This sort of belt doesn't require a bar and holes to hold it tight and closed. The crossbar of the square acts as the tightener and holds the belt closed.
Step four:
Cut a piece of wire 2 inches long. It's going to be more than your need but trust me when I say it would be far harder with any shorter.
Step Five:
Bend the wire into shape. This sort of belt doesn't require a bar and holes to hold it tight and closed. The crossbar of the square acts as the tightener and holds the belt closed.
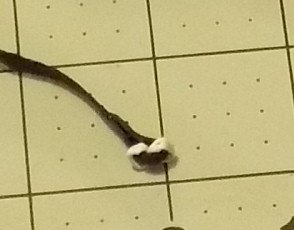
The final shape should look like this.
Step six:
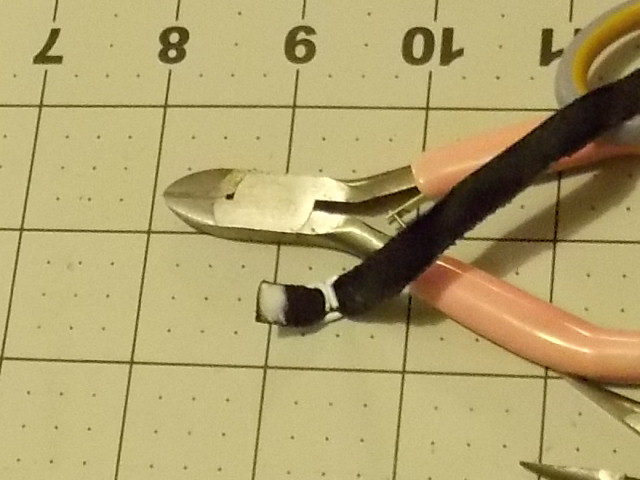
Pull the straight end of the belt body through on both sides of the crossbar in the middle of the buckle. You will need a half inch length on the straight end of the belt for the next stage. My belt body is a bit too wide for the buckle, but for the purpose of the tutorial it will do fine. Make sure the inside height of the buckle you make is slightly longer than the width of your belt body.
Pull the straight end of the belt body through on both sides of the crossbar in the middle of the buckle. You will need a half inch length on the straight end of the belt for the next stage. My belt body is a bit too wide for the buckle, but for the purpose of the tutorial it will do fine. Make sure the inside height of the buckle you make is slightly longer than the width of your belt body.
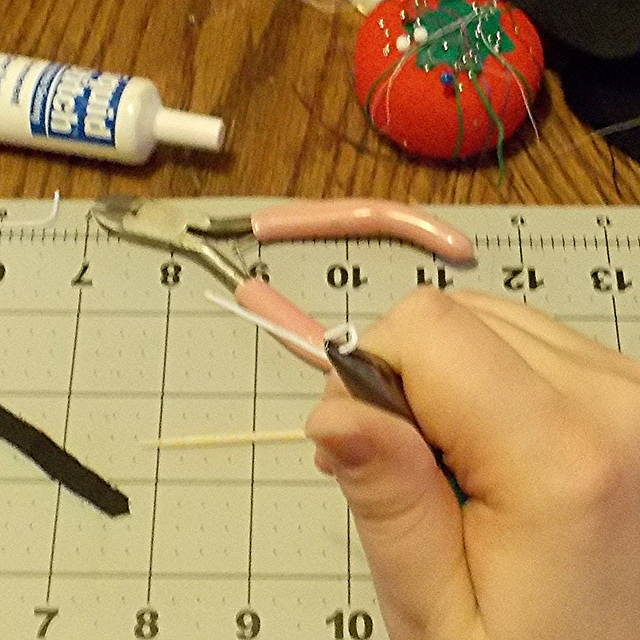
Step seven:
Use the tooth pick to spread the glue. It is easier to spread on the narrow fabric piece or leather you have chosen than the finger. You will get a more even coverage. Only cover one half of the short end so that there will be enough room for the belt body to move on the crossbar.
Use the tooth pick to spread the glue. It is easier to spread on the narrow fabric piece or leather you have chosen than the finger. You will get a more even coverage. Only cover one half of the short end so that there will be enough room for the belt body to move on the crossbar.
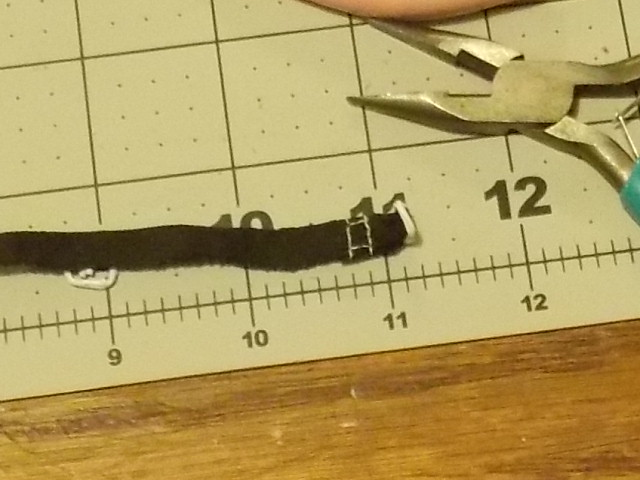
Step eight:
Close the two pieces together allowing at least 1/8th inch between the glue and crossbar for it to move easily.
Close the two pieces together allowing at least 1/8th inch between the glue and crossbar for it to move easily.
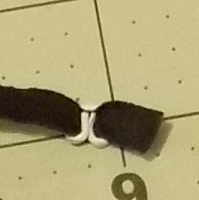
Step nine:
Sew the glued area together with matching thread. This will strengthen it and insure it doesn't come open in the future. Ignore the white thread in the picture. I chose it to show the step.
Sew the glued area together with matching thread. This will strengthen it and insure it doesn't come open in the future. Ignore the white thread in the picture. I chose it to show the step.
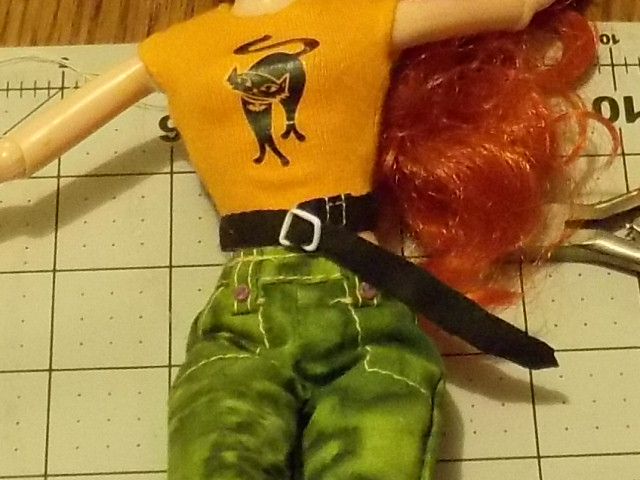
Step ten:
Put the belt on the doll and adjust the length until you have it looking the way you want.
Put the belt on the doll and adjust the length until you have it looking the way you want.
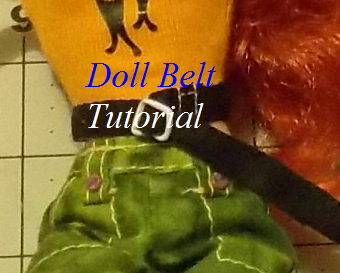
That is all there is to it. Ten easy steps and you have a unique accessory for your dolls.
 RSS Feed
